Master the Art of Perfect Pour Over Coffee
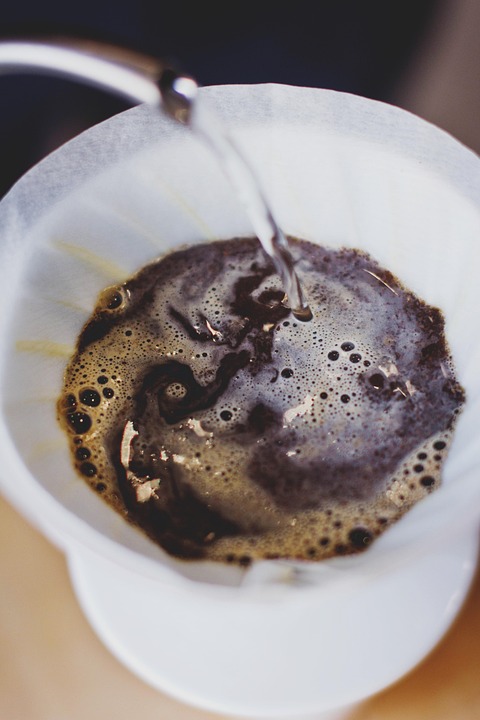
The allure of pour over coffee lies in its simplicity and the control it offers over every aspect of the brewing process. Unlike automated coffee makers, pour over brewing allows you to manage variables like water temperature, brewing time, and coffee-to-water ratio. This hands-on approach not only enhances the brewing experience but also results in a cup of coffee that is rich in flavor and personalized to your taste preferences.
Understanding the Basics
Pour over coffee is a manual brewing method that involves pouring hot water over coffee grounds in a filter, allowing it to drip into a carafe or mug below. The process is straightforward, yet each step plays a critical role in determining the final taste of the coffee.
Tools and Equipment Needed
To get started with pour over coffee, you will need the following equipment:
- Coffee Grinder: A burr grinder is recommended for a consistent grind size.
- Pour Over Brewer: Popular options include the Hario V60, Chemex, and Kalita Wave.
- Filters: Choose filters that fit your brewer; they can be paper or metal reusable filters.
- Gooseneck Kettle: Provides precise control over water flow and direction.
- Scale: Helps measure coffee and water accurately for consistency.
- Timer: Essential for tracking brewing time.
The Importance of Fresh Coffee
For the best flavor, use freshly roasted coffee beans. Coffee begins to lose its flavor shortly after roasting, so aim to use beans within two to three weeks of their roast date. Grinding just before brewing ensures maximum freshness and aroma.
The Step-by-Step Guide to Perfect Pour Over Coffee
Step 1: Measure and Grind Your Coffee
Start by measuring your coffee beans. A common ratio is 1:15, which means 1 gram of coffee to 15 grams of water. Adjust this ratio according to your taste preferences. Use a burr grinder to grind the coffee to a medium-fine consistency, similar to table salt.
Step 2: Prepare the Filter
Place the filter in your pour over brewer. If you’re using a paper filter, rinse it with hot water to remove any paper taste and preheat the brewer. Discard the rinse water before proceeding.
Step 3: Set Up Your Brewer
Place the brewer on top of your carafe or mug and add the ground coffee to the filter. Gently shake the brewer to level the coffee bed for even extraction.
Step 4: Heat the Water
Heat your water to a temperature between 195°F and 205°F (90°C to 96°C). If you don’t have a temperature-controlled kettle, bring the water to a boil and let it sit for 30 seconds to achieve the right temperature.
Step 5: The Bloom
Begin by pouring a small amount of water, about twice the weight of the coffee, over the grounds. This is known as the “bloom.” It allows gases to escape and prepares the grounds for even extraction. Let it sit for 30 to 45 seconds.
Step 6: Continue Pouring
After the bloom, start pouring the remaining water slowly and steadily in a circular motion, working your way from the center to the edges and back to the center. Maintain a consistent flow and avoid pouring directly onto the filter. This process should take about 2.5 to 3.5 minutes.
Step 7: Let It Drip
Once you’ve finished pouring, allow the coffee to drip through the filter completely. The total brewing time should be around 3 to 4 minutes. If it takes significantly longer or shorter, adjust your grind size next time.
Mastering the Technique
Experiment with Ratios
The coffee-to-water ratio is crucial in determining the strength and flavor of your brew. While 1:15 is a good starting point, feel free to experiment with ratios to find your perfect cup. A higher ratio will produce a stronger brew, while a lower ratio will result in a lighter cup.
Adjust the Grind Size
Grind size affects extraction time and flavor. If your coffee tastes bitter, try a coarser grind to speed up the extraction. If it’s too weak or sour, a finer grind may help. Keep experimenting until you find the right balance.
Mind Your Pouring Technique
Pouring technique is vital for even extraction. A steady hand ensures even saturation of the coffee grounds. Practice controlling the flow rate and pouring pattern to achieve consistency.
Troubleshooting Common Issues
Over-Extraction
Over-extraction occurs when water stays in contact with the coffee grounds for too long, resulting in a bitter taste. To fix this, try using a coarser grind, reducing the brewing time, or lowering the water temperature.
Under-Extraction
Under-extraction happens when the brewing time is too short, leading to a sour or weak flavor. Use a finer grind, increase the brewing time, or ensure that the water temperature is within the appropriate range.
Uneven Extraction
Uneven extraction can result from an inconsistent grind size or poor pouring technique. Ensure your grinder is set to a consistent size and practice pouring in a controlled, even manner.
Enhancing Your Pour Over Experience
Choose the Right Beans
The choice of coffee beans significantly impacts the flavor profile of your pour over coffee. Experiment with different origins, roast levels, and processing methods to discover your preferences.
Consider Water Quality
Water makes up the majority of your coffee, so its quality is crucial. Use filtered water free of impurities and excessive minerals for the best results.
Explore Different Brewers
Different pour over brewers can yield varying flavor profiles due to differences in design and flow rate. Experiment with devices like the Chemex, Hario V60, and Kalita Wave to find the one that suits your taste.
Conclusion
Mastering the art of pour over coffee is a rewarding journey that combines science and creativity. By understanding the fundamentals and experimenting with variables like grind size, coffee-to-water ratio, and pouring technique, you can craft a cup of coffee that is uniquely yours. Embrace the process, enjoy the ritual, and savor each sip of the perfect pour over coffee.
#ChatGPT assisted in the creation of this article.



Post Comment